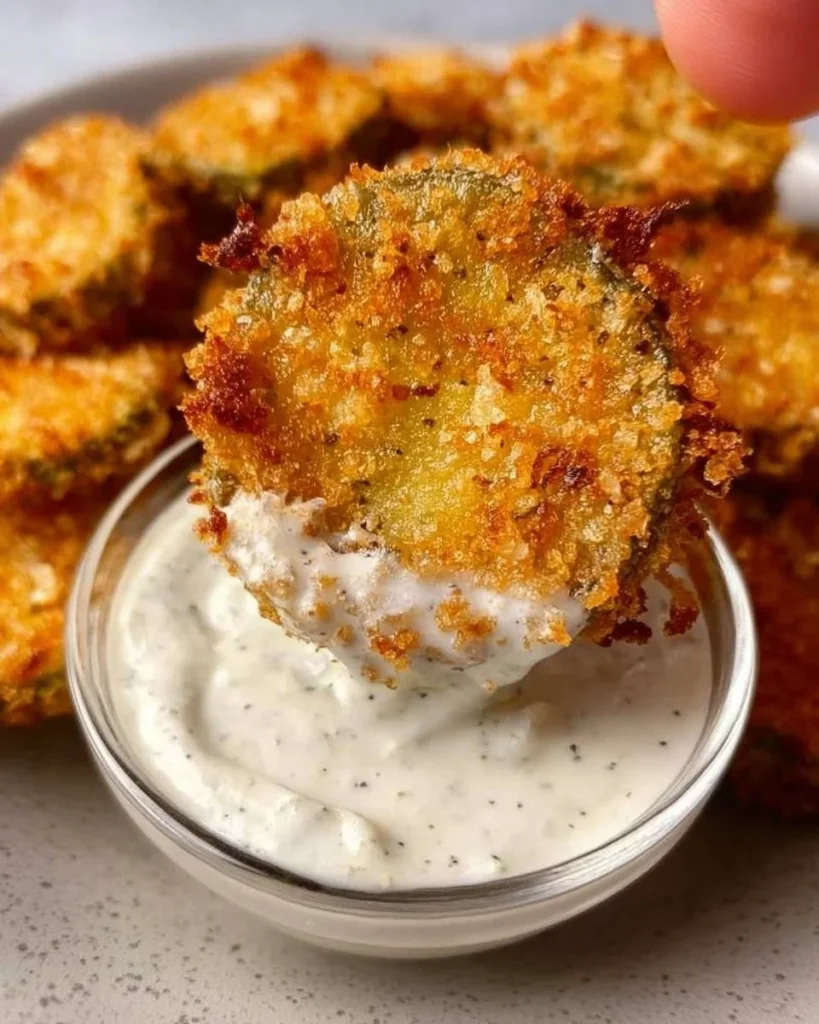
Ah, fried pickles! There’s a certain charm to biting into their crunchy exterior and meeting the tangy, briny pickle inside. I still remember the first time I tried them at a summer fair—the warm sun above me and laughter in the air as I took that deliciously messy bite. It was love at first crunch! There’s something about that contrast between crispy and sour that keeps you coming back for more. And trust me, once you make them in the air fryer, you’ll never want to deep fry them again. It’s a game changer.
Why You'll Love This Recipe
So, why should you give this Air Fryer Fried Pickles recipe a go tonight? For starters, they’re not just a snack; they’re an experience! Imagine serving them at your next gathering or enjoying them while binge-watching your favorite show. The flavors are a delightful blend of crunch, tang, and spice, and they offer a little something different than your usual chips or popcorn. Plus, making them yourself means you control the ingredients, cutting down on unwanted oils while still keeping that addictive crispiness.
And let’s not forget how easy this recipe is! You only need a handful of ingredients and about 15 minutes of prep and cook time. They make for a great appetizer, party treat, or even a side dish for your next BBQ. Trust me; these little bites of heaven are going to steal the spotlight!
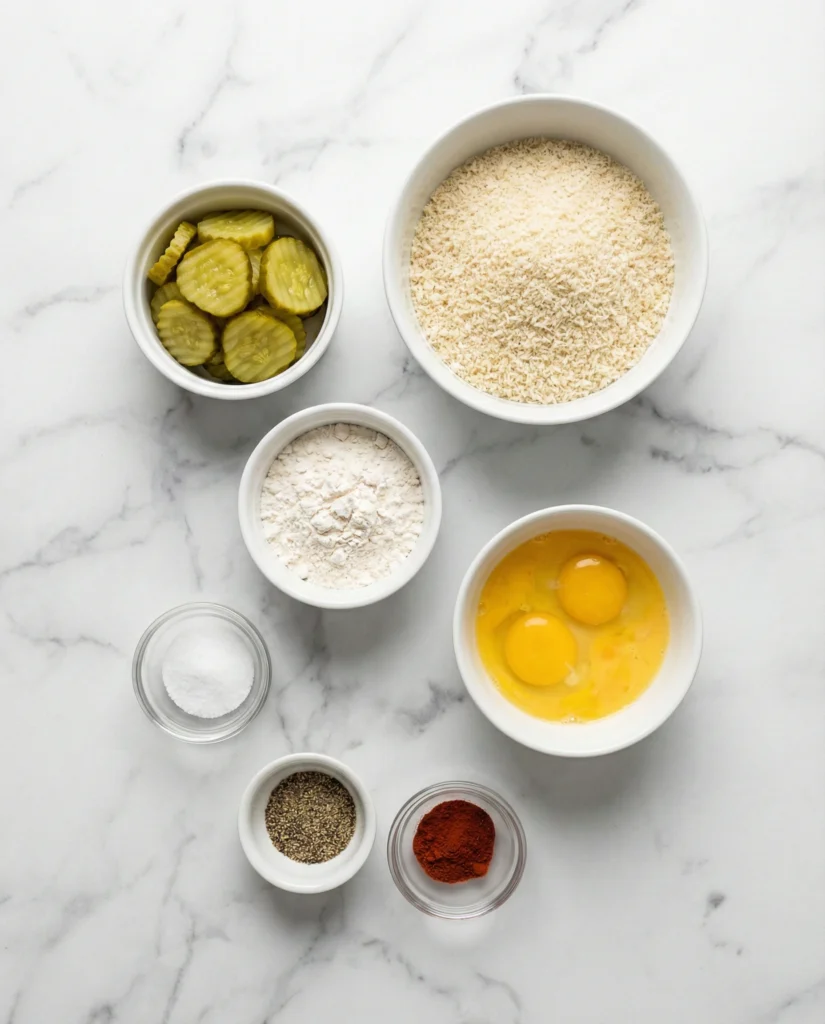
Gather These Ingredients
Let’s talk about what you’ll need. Each ingredient plays its role beautifully in this culinary symphony.
Dill Pickles (or any type of pickles you prefer): The star of the show! The classic dill pickle brings a tangy burst of flavor, but feel free to get creative. Bread and butter pickles can add a sweet twist, or even spicy pickles for that extra kick.
Breadcrumbs: These are the magic dust that gives your pickles that incredible crunch. You can use plain or seasoned breadcrumbs—whatever you have on hand. But if you really want to elevate them, try panko breadcrumbs for an extra light and crispy texture.
Flour: This is your glue. A light dusting of flour help the egg adhere to the pickles nicely, creating a perfect base for those breadcrumbs.
Eggs: Beaten and ready to coat! They add richness and help bind everything together.
Salt and Black Pepper: Simple staples, but they boost the flavor tremendously. Don’t be shy—season liberally!
Optional Spices (like garlic powder or paprika): The fun part! You can really customize these pickles to your taste. A dash of garlic powder brings an extra layer of umami, while paprika provides a sweet smokiness that can bring the whole dish to life.
How This Recipe Comes Together
Ready to get crunching? Here’s a step-by-step guide that’ll have you whipping these up like a pro.
Preheat the air fryer to 400°F (200°C). This is key for that all-important crispiness!
Slice the pickles into chips if they’re whole. Aim for about a quarter-inch thickness—too thick, and they might not cook through; too thin, and you'll lose that satisfying bite.
Set up your breading station: Grab three shallow bowls. One for flour seasoned with salt and pepper, one for beaten eggs, and one for breadcrumbs mixed with your favorite spices. This makes the assembly line much more efficient.
Coat the pickle slices: First, dip each slice into the flour, shaking off the excess. Next, immerse it in the egg, allowing the extra to drip off, and finally, roll it in the breadcrumbs, ensuring it’s fully coated. It’s like giving your pickles a cozy little hug!
Place the coated pickles in a single layer in the air fryer basket. Give them a little space; we want that glorious air circulation!
Cook for about 10-12 minutes, flipping halfway through for an even golden brown. They’re done when they look irresistible and crispy!
Serve hot with your favorite dipping sauce, whether it’s ranch, spicy mayo, or a garlic aioli. Your taste buds are in for a treat!
Best Way to Enjoy It
There’s no wrong way to enjoy Air Fryer Fried Pickles, but here are a few suggestions to really bring out their flavors:
Pair them with a classic ranch dressing for that cool, creamy contrast.
Feeling adventurous? Try a spicy garlic aioli for a little kick.
Serve alongside mini sandwiches or sliders at your next party for an enjoyable spread that pairs perfectly.
And don’t forget—the pickles can shine on their own as a snack too. Grab a few and enjoy them straight out of the basket!
Keeping Leftovers Fresh
So, what to do if you have leftovers (if that ever happens)? Here’s how to handle that:
Storage: Allow your fried pickles to cool completely. Place them in an airtight container and keep them in the fridge for up to three days. They’re best eaten fresh, but I get it! Life happens.
Reheating: When you're ready to enjoy them again, pop them back in the air fryer at 350°F (175°C) for about 5-7 minutes until they’re warm and crispy again. Skip the microwave—you want to retain that crunch!
Freezing: You can freeze raw, breaded pickles before cooking them if you want to prepare them ahead of time. Just layer them between parchment paper in a freezer-safe container. When you’re ready, cook them straight from the freezer—just give them an extra couple of minutes!
Helpful Cooking Tips
A few extra nuggets of wisdom to ensure your fried pickles are the best they can be:
Make sure your pickles are well-drained before breading. Too much moisture can make them soggy.
Don’t skimp on seasoning! This is your chance to make those fried pickles burst with flavor.
Experiment with spice mixes! Maybe throw in some Italian seasoning or a pinch of cayenne for a zesty twist.
If you're feeling extra fancy, you could even add a dusting of grated Parmesan to your breadcrumbs for a cheesy crunch.
Creative Twists
Feel free to customize your fried pickles! Here are some creative ideas to inspire you:
Cheesy Pickles: Add shredded cheese to your breadcrumb mixture for a cheesy crunch that’s absolutely addictive!
Dill-icious Pickles: Infuse your breadcrumbs with dried dill or oregano to bring out that fresh herb flavor.
Vegetable Variation: Swap out pickles for other veggies like zucchini or mushrooms. Just adjust the cooking time as necessary.
Spice it Up: For a kick, toss some cayenne pepper or chili powder in the flour—nothing like a little heat!
Ingredients List
Dill pickles (or any type of pickles you prefer)
Breadcrumbs
Flour
Eggs
Salt
Black pepper
Optional: garlic powder, paprika, or any preferred spices
How to Prepare It
Preheat the air fryer to 400°F (200°C).
Slice the pickles into chips if they are whole.
Set up a breading station:
Shallow bowl with flour, salt, and pepper.
Shallow bowl with beaten eggs.
Shallow bowl with breadcrumbs and optional spices.
Dip each pickle slice in flour, then egg, then breadcrumbs, ensuring an even coat.
Place the coated pickles in a single layer in the air fryer basket.
Cook for 10-12 minutes, flipping halfway until golden brown and crispy.
Serve hot with your favorite dipping sauce.
Your Questions Answered
How long does it take to make? Prep takes about 15 minutes, and cooking takes 10-12 minutes. You can have these ready in less than half an hour!
Can I use other pickles? Absolutely! Bread and butter pickles or spicy pickles can add a whole new flavor profile.
Can I do this without an air fryer? You can, but you'll need to deep-fry or bake them in the oven. Adjust cooking times accordingly.
What is the best dipping sauce? It’s all about personal preference, but ranch, spicy mayo, and garlic aioli are all fantastic.
How do I make them gluten-free? Use gluten-free breadcrumbs and flour alternatives, and you’ll be good to go!
If you've come this far, take the plunge! There’s nothing quite like the burst of flavor from a freshly made air fryer fried pickle. Don’t be afraid to experiment, share your own spins, or tell your stories! Invite your friends and family over for a little pickle party and get ready for them to ask for seconds. Happy cooking!
Experience the delightful crunch of air-fried pickles, offering a tangy burst of flavor without the excess oil of traditional frying. Perfect as an appetizer or snack!
Ingredients
Main Ingredients
1jar Dill pickles (or any type of pickles you prefer) (Slice into chips)
Preheat the Air FryerPreheat the air fryer to 400°F (200°C).
2
Slice the PicklesSlice the pickles into chips if they are whole. Aim for about a quarter-inch thickness.
3
Set Up Breading StationGrab three shallow bowls for flour (seasoned with salt and pepper), beaten eggs, and breadcrumbs mixed with your preferred spices.
4
Coat the PicklesDip each pickle slice into the flour, followed by egg, and finally roll in breadcrumbs until fully coated.
5
Air Fry the PicklesPlace the coated pickles in a single layer in the air fryer basket and cook for 10-12 minutes, flipping halfway through.
6
ServeServe hot with your favorite dipping sauce.
Nutrition Facts
Servings 4
Amount Per Serving
Calories150kcal
% Daily Value *
Total Fat8g13%
Saturated Fat1g5%
Trans Fat0g
Cholesterol50mg17%
Sodium500mg21%
Potassium150mg5%
Total Carbohydrate15g5%
Dietary Fiber1g4%
Sugars1g
Protein4g8%
Iron 1 mg
* Percent Daily Values are based on a 2,000 calorie diet. Your daily value may be higher or lower depending on your calorie needs.
Note
Ensure pickles are well-drained before coating to avoid sogginess.
Keywords: fried pickles, air fryer, easy appetizer, snack, tangy
Pin this recipe to share with your friends and followers.
Irelia Novak
Food and Lifestyle Blogger
Hi, I'm Irelia Novak, a passionate home cook and food blogger who loves turning simple ingredients into delicious everyday meals. I live a cozy, family-centered life and enjoy exploring new flavors, discovering fresh ideas, and sharing inspiring recipes. When I’m not in the kitchen, you’ll find me traveling, journaling, or spending quality time with the people I love.