There’s something downright magical about chocolate mousse brownies, don’t you think? Whenever I bite into one, I’m transported back to the first time I tasted this delightful combination: rich, fudgy brownies mollified by pillowy mousse, then topped with a shiny chocolate ganache that glistens like a treasure. It all started when I was in culinary school, and we had to experiment with desserts that could bring guests to their knees. This recipe has since become my go-to showstopper for everything from dinner parties to casual gatherings with friends. And let me tell you—the joy of slicing into these beauties, revealing their luscious layers, is an experience you won’t want to miss!
Why you’ll love this recipe
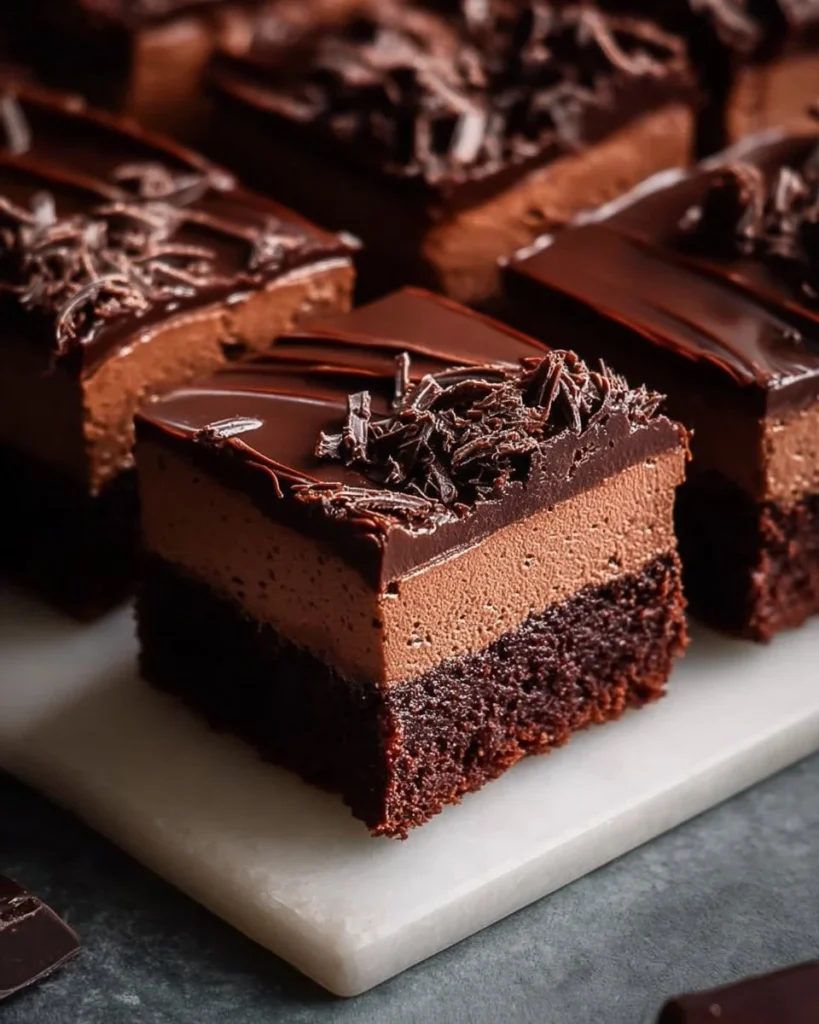
Imagine sinking your teeth into a piece of dark chocolate goodness that melts in your mouth, hinting at bittersweet notes while also satisfying that sweet tooth. The brownies offer a deep chocolate experience, while the mousse adds a light, airy texture that just dances on your palate. The ganache, ohmygoodness, that smooth, glossy coating? It’s like the icing on a very delicious cake—not too sweet, just the right touch of chocolatey bliss to send you over the edge!
This recipe combines the best of several worlds: it’s rich yet refined, simple yet impressive. Perfectly suited for any occasion, these brownies will gain you lots of love. Do you need impressing? Check! Want comfort food that feels fancy? Absolutely! Plus, preparing this dessert is a delightful way to spend your afternoon. Who can resist the allure of chocolate in any form? Trust me; you won’t regret trying your hand at this delightful treat.
Gather these ingredients
Let’s walk through the magic makers of this recipe, shall we?
Unsalted Butter (1 cup): This creamy richness is our base. Always go for unsalted, so you can control the flavor.
Dark Chocolate (8 oz, chopped): The heart and soul of our brownies. Use good quality chocolate! Aim for at least 70% cocoa; it intensifies the flavor beautifully.
Granulated Sugar (1 cup): Sweet, sweet sugar to balance the bitterness of the chocolate. It’s going to make those brownies decadent!
Large Eggs (4): Adding moisture and richness, eggs are our binding agents. They make everything fluffier too!
Vanilla Extract (1 tsp): Because who doesn’t love the roundness that vanilla brings to chocolate? It’s like adding a secret hug!
All-Purpose Flour (1 cup): This helps structure the brownies without making them dry. We want fudgy, not cakey!
Cocoa Powder (1/4 cup): For that extra chocolate kick! Make sure it’s unsweetened for balance.
Salt (1/4 tsp): Just a pinch to elevate those flavors—never skip the salt!
Heavy Cream (1 cup): For the mousse! It whips up light and fluffy, adding a luscious texture.
Semi-Sweet Chocolate (4 oz, chopped): This fits right into the ganache, complementing the heavy cream perfectly.
Butter (1 tbsp for ganache): A little more richness to balance the semi-sweet chocolate and give it that glossy finish.
How this recipe comes together
Ready to get your chocolate fix? Let’s dive into the step-by-step instructions; trust me, once you make these, you’ll never go back!
Prep the Oven & Pan: Preheat your oven to 350°F (175°C) and grease a 9×13 inch baking pan. You want the brownies to glide out like a dream!
Melt the Magic: In a saucepan over low heat, melt the butter and dark chocolate together. Stir until it’s all silky smooth and combined—this is where the magic begins.
Sweeten the Deal: Once your chocolate mixture is off the heat and slightly cooled, stir in the granulated sugar until it’s fully mixed in.
Crack those Eggs: Gradually add in your eggs one at a time, mixing diligently after each addition—this serves as your emulsifier, pulling everything together. Don’t forget the vanilla extract; it brings a hint of warmth!
Combine the Dry Ingredients: In a separate bowl, whisk together the flour, cocoa powder, and salt. Gradually fold these dry ingredients into the wet mixture until just combined—over mixing is a no-go; we want those fudgy brownies!
Bake it Up: Pour the brownie batter into your prepared pan and bake for about 25-30 minutes. A toothpick should come out with just a few moist crumbs. That’s your cue!
Cool Down: Let those brownies sit in the pan and cool completely.
Prepare the Mousse: While the brownies cool, whip the heavy cream to soft peaks. Melt the semi-sweet chocolate and let it cool just a tad before folding it into your whipped cream. Be gentle; we want it light and airy.
Mousse Layer: Once the brownies are cool, spread that heavenly mousse over the top, letting it settle down into every nook and cranny.
Ganache Glory: For the ganache, melt together the chopped semi-sweet chocolate and butter until it’s smooth and shiny. Pour it over the mousse layer for that glossy finish; let it cascade down the sides if you dare!
Chill and Thrill: Pop these beauties into the fridge for at least 2 hours. The anticipation is part of the fun!
Slice and Serve: Cut into squares and let the admiration begin. Trust me; they’re going to disappear quickly!
Best way to enjoy it
How do you serve these delightful brownies? Let me share a few of my favorite serving suggestions.
- Go classic: Serve them with a scoop of vanilla ice cream for a delightful contrast in temperature and texture.
- Add a sprinkle of sea salt on top of the ganache for that sweet-and-salty combo that will have everyone swooning.
- Drizzle with a touch of raspberry or caramel sauce for a fruity counterpoint or rich kick.
- Garnish with fresh berries or mint leaves to provide a refreshing palate cleanser.
Keeping leftovers fresh
So, what happens if you have a few sweet morsels left after your guests have left? Fear not! To keep those brownies fresh and legendary for a few days, cover them tightly with plastic wrap or transfer them to an airtight container. They’ll last in the fridge for about 4–5 days.
You can also freeze these delights for up to three months! Just make sure they’re well-covered to avoid freezer burn. When you crave a treat, let them thaw at room temperature for a while—or pop them briefly in the oven to bring back that fudgy, melt-in-your-mouth quality.
Pro chef tips
- Room Temperature Ingredients: Having your eggs and butter at room temperature helps in achieving that lovely, emulsified texture.
- Don’t Overmix: When integrating the flour, just mix until everything is combined to keep that fudgy feeling intact.
- Quality Counts: Choose the best chocolate you can find; it makes a noticeable difference in flavor. This is not the time to skimp!
Flavor swaps
Feeling adventurous? Here are some variations to jazz up these brownies:
- Nutty Bliss: Fold in some chopped nuts, like walnuts or pecans, before baking for an extra crunch.
- Spicy Twist: Add a pinch of cayenne to the brownie batter for a kick of heat that pairs unbelievably well with the richness of chocolate.
- Citrus Zest: Incorporate some orange or lemon zest into the mousse for a delightful freshness.
- Liqueur Infusion: For the grown-ups, a splash of coffee liqueur or bourbon in the ganache can elevate those complex flavors nicely.
Your questions answered
What’s the prep time?
The total prep time is about 20 minutes, and then you’ll need to bake for 25–30 minutes and chill for at least 2 hours afterward.Can I make it gluten-free?
Absolutely! Substitute the all-purpose flour with a gluten-free blend. It should be just as delicious!How can I make this dairy-free?
Swap the butter with coconut oil and use dairy-free chocolate and cream for both mousse and ganache.How long do these keep?
They can be stored in the fridge for 4–5 days, or frozen for up to three months. Just ensure they’re wrapped well!What should I pair with it?
A hot cup of espresso or a rich red wine pairs wonderfully with the depth of chocolate, making your serving even more enjoyable.
Ah, and there you have it—the world of Chocolate Mousse Brownies waiting just for you!
They’re a decadent reward after a long day, a celebration of sweet love with friends, or even a comforting hug after a tough week. Let your creativity shine as you embark on this chocolaty adventure, and remember to share your delicious results with me. There’s nothing better than being part of a wonderful cooking community, filled with tasty experiments and collective smiles! So gather your ingredients and let’s make some delicious memories together. Happy baking!

Chocolate Mousse Brownies
Description
Indulge in the rich and airy experience of Chocolate Mousse Brownies, topped with a glossy chocolate ganache. Perfectly fudgy and delightful, these brownies will impress at any gathering.Ingredients
For the Brownies
For the Mousse
Instructions
Baking the Brownies
Preheat the Oven & Pan
Preheat your oven to 350°F and grease a 9x13 inch baking pan.This will help the brownies come out easily.Melt the Magic
In a saucepan over low heat, melt butter and dark chocolate together until smooth.Mix in Sugar
Remove from heat, cool slightly, then stir in granulated sugar.Add Eggs & Vanilla
Add eggs one at a time, mixing well, and add vanilla extract.Combine Dry Ingredients
In another bowl, whisk flour, cocoa powder, and salt. Fold into the wet mixture until combined.Do not over mix to retain fudginess.Bake
Pour batter into the prepared pan and bake for 25-30 minutes.A toothpick should come out with a few moist crumbs.Cool Brownies
Let brownies cool completely in the pan.
Making the Mousse and Ganache
Prepare the Mousse
Whip the heavy cream to soft peaks. Melt semi-sweet chocolate and fold into the whipped cream.Be gentle to maintain fluffiness.Spread Mousse
Spread mousse over cooled brownies evenly.Make Ganache
Melt together chopped semi-sweet chocolate and butter until smooth.Pour ganache over the mousse layer.Chill
Refrigerate for at least 2 hours before serving.Serve
Slice into squares and enjoy!Pair with ice cream or a sprinkle of sea salt for extra flavor.
Nutrition Facts
Servings 16
- Amount Per Serving
- Calories 300kcal
- % Daily Value *
- Total Fat 22g34%
- Saturated Fat 13g65%
- Trans Fat 1g
- Cholesterol 80mg27%
- Sodium 150mg7%
- Potassium 200mg6%
- Total Carbohydrate 30g10%
- Dietary Fiber 2g8%
- Sugars 20g
- Protein 4g8%
- Vitamin A 500 IU
- Vitamin C 1 mg
- Calcium 50 mg
- Iron 2 mg
- Vitamin D 0 IU
- Vitamin E 1 IU
- Vitamin K 2 mcg
- Thiamin 0.1 mg
- Riboflavin 0.1 mg
- Niacin 0.5 mg
- Vitamin B6 0.1 mg
- Folate 10 mcg
- Vitamin B12 0 mcg
- Biotin 0 mcg
- Pantothenic Acid 0.5 mg
- Phosphorus 100 mg
- Iodine 0 mcg
- Magnesium 30 mg
- Zinc 0.5 mg
- Selenium 0 mcg
- Copper 0.2 mg
- Manganese 0.5 mg
- Chromium 0 mcg
- Molybdenum 0 mcg
- Chloride 0 mg
* Percent Daily Values are based on a 2,000 calorie diet. Your daily value may be higher or lower depending on your calorie needs.