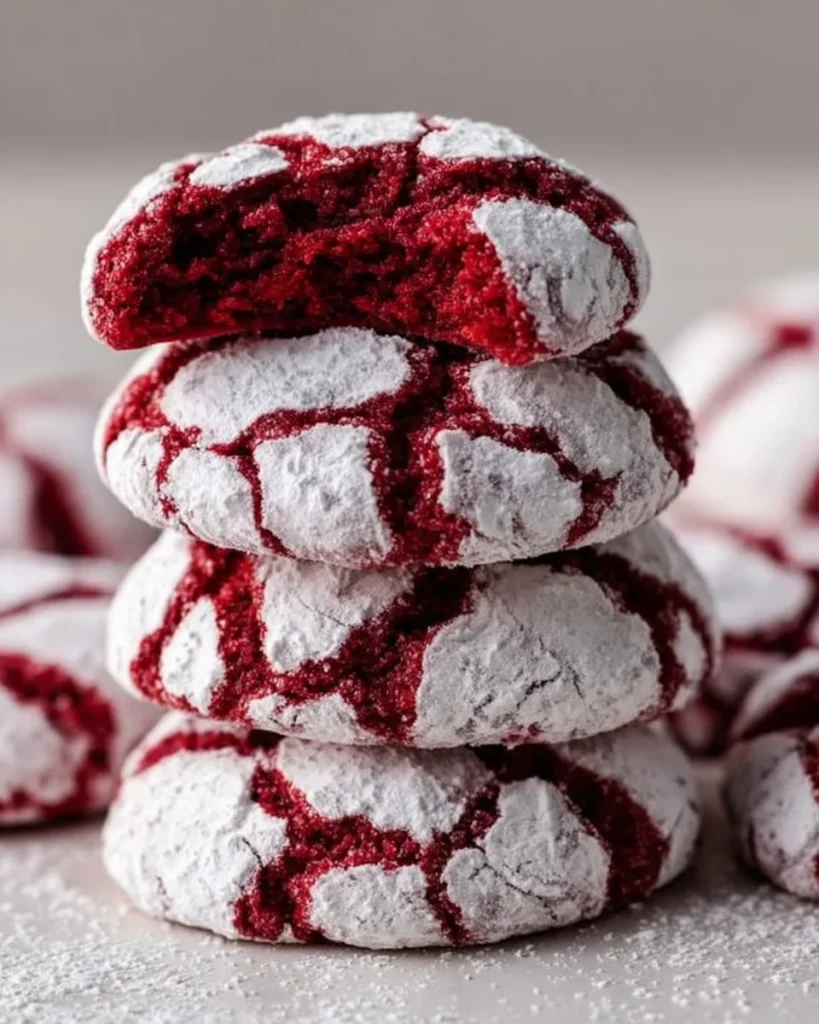
Ah, the allure of Red Velvet Crinkle Cookies! It’s hard for me to conceal my excitement as I talk about these delightful little treats. Each time I whip up a batch, it takes me back to cozy afternoons spent in my mom’s kitchen. The vibrant red hue, the cocoa-rich flavor, and that irresistible powdered sugar coating—it’s like inviting a party in your mouth. What’s even better? They’re perfect for any occasion, from birthday celebrations to holiday gatherings, or even just a regular Tuesday when you need a little pick-me-up.
Why you’ll love this recipe
These Red Velvet Crinkle Cookies are the epitome of decadence without being overly complicated. First off, the texture is to die for. You get that chewy, soft center contrasted with a slightly crisp exterior—absolutely heavenly. It’s the perfect balance of flavors, and anyone who takes a bite can’t help but smile. Plus, that striking red color makes them visually stunning, a true showstopper on any dessert table.
Not to mention, they’re surprisingly versatile. You can enjoy them as is, dunk them in a glass of cold milk, or pair them with a scoop of vanilla ice cream for a truly indulgent treat. And really, what’s better than delightful cookies filled with memories? Baking these not only sweetens the kitchen but also warms the heart.
Gather these ingredients
Let’s talk about what you’ll need to make these cookies truly fabulous:
2 cups all-purpose flour: This is your foundation. It gives the cookies structure but allows them to maintain that soft, tender bite.
1/2 cup cocoa powder: Make sure it’s unsweetened! This adds a rich chocolate flavor that complements the natural sweetness beautifully.
1 teaspoon baking powder: A little bit of lift here is necessary to create those perfect puffy shapes.
1/2 teaspoon salt: Salt is like the unsung hero of sweet treats. It really brings out the flavors, balancing the sweetness perfectly.
1 cup granulated sugar: Sweetness is essential! This sugar not only sweetens the dough but contributes to that wonderful crinkle effect.
1/2 cup unsalted butter, softened: Softened butter is crucial for creating that creamy mix with the sugar.
1 large egg: This is the binding agent that helps everything stick together.
1 teaspoon vanilla extract: A must for that warm depth of flavor that ties all the elements together.
1 tablespoon red food coloring: This is what transforms a basic cookie into the glorious red velvet variation we adore.
Powdered sugar for rolling: This gives the cookies that signature crinkle look and adds a lovely sweetness in every bite.
Preparing Red Velvet Crinkle Cookies
Now, let’s dive into the step-by-step magic of making these beauties!
Preheat your oven to 350°F (175°C). It’s crucial for ensuring even baking.
Whisk together the dry ingredients: In a medium bowl, combine the flour, cocoa powder, baking powder, and salt. Set this aside; it’s super important to mix the dry ingredients first to ensure even distribution.
Cream a heavenly mixture: In a larger bowl, beat together your softened butter and granulated sugar until it’s light and fluffy. This is your magic moment—don’t rush it. About 3-5 minutes should do the trick.
Add the wet ingredients: Mix in the large egg, vanilla extract, and red food coloring. Make sure you blend thoroughly to achieve that deep crimson hue.
Combine: Gradually fold the dry ingredients into your creamy mixture. You should have a nice, shiny dough. (Remember, don’t overmix—just let them hug it out until combined.)
Get hands-on: Scoop out tablespoon-sized portions of dough and roll them into balls. Then roll each ball in powdered sugar until generously coated.
Prepare for baking: Place your dough balls on a baking sheet lined with parchment paper, spacing them about 2 inches apart.
Bake: Slide them into the oven and let them bake for 10-12 minutes. You’re looking for that perfect edge-set with a soft center—trust your instincts here!
Cool down, please: Let them chill on the baking sheet for about 3 minutes before you transfer them to a wire rack to cool completely.
Best way to enjoy it
When it comes to serving these delightful cookies, the options are endless! For a classic pairing, a tall glass of cold milk is always a winner. Feeling indulgent? Serve them warm with a scoop of vanilla ice cream on top, allowing the warmth of the cookie to slightly melt the ice cream—pure bliss!
If you’re hosting a gathering, why not create a dessert platter? Pair these red velvet crinkles with some chocolate chip cookies and a rich brownies batch. You could even include fresh berries for a lovely color contrast and a bit of tartness to balance all that sweetness.
How to store and freeze
Got leftovers—or simply want to make ahead? These cookies can be stored in an airtight container at room temperature for about a week. Just make sure you let them cool completely before sealing them away.
For longer storage, you can freeze the unbaked dough! Simply shape the dough into balls, freeze them on a baking sheet for an hour, then transfer them to a freezer bag. When you’re ready for a fresh-baked treat, pop them straight from the freezer into the oven—just add a couple of minutes to the baking time. It’s a great way to have fresh cookies at a moment’s notice without the fuss!
Tips for a successful recipe
- Don’t skip the cooling time on the baking sheet before transferring to a wire rack—it allows them to set properly and avoids breaking.
- Use gel food coloring instead of liquid for a more vibrant color without altering the dough’s texture.
- Consider using baking parchment instead of foil for a non-stick surface that preserves those lovely crinkles.
Creative Twists
Feeling adventurous? You can spice things up with a few variations! How about adding a handful of chocolate chips for extra indulgence or swirling in some cream cheese frosting for a decadent surprise? If you’re looking for a minty twist, toss in some crushed peppermint candies in the dough.
For a fun seasonal touch, consider using festive sprinkles or colored sugars. Or, if you’re feeling crafty, why not roll the dough balls in crushed nuts instead of powdered sugar for a delightful crunch and a slightly different flavor profile?
Common Questions
- How much time do I need for prep and bake? Expect about 20 minutes for prep and another 12 for baking.
- Can I use whole wheat flour? Yes, but it will slightly alter the texture. Your cookies may be chewier!
- What if I don’t have red food coloring? You could use beet powder as a natural color alternative, but the flavor will differ a bit.
- Can I skip the powdered sugar rolling? Technically, yes, but you’ll miss out on that classic crinkle effect and extra sweetness!
- How can I make these gluten-free? Simply swap the all-purpose flour for a gluten-free blend; ensure it has xanthan gum for proper structure.
Red Velvet Crinkle Cookies are more than just a treat; they’re an experience, a celebration of flavors, and a beautiful way to bring joy. As you mix, roll, and bake, remember it’s all about the love you pour into the process. So, gather up your ingredients, sprinkle a little happiness into your day, and enjoy every bite of these scrumptious cookies. Happy baking!

Red Velvet Crinkle Cookies
Description
These Red Velvet Crinkle Cookies are the perfect balance of chewy, rich chocolate flavor and a vibrant red hue, coated with powdered sugar for a visually stunning treat.Ingredients for Red Velvet Crinkle Cookies
Dry Ingredients
Wet Ingredients
Instructions for Baking Red Velvet Crinkle Cookies
Making the Cookies
Preheat Oven
Preheat your oven to 350°F (175°C).This ensures even baking.Whisk Dry Ingredients
In a medium bowl, combine the flour, cocoa powder, baking powder, and salt. Set aside.Mixing dry ingredients first ensures even distribution.Cream Butter and Sugar
In a larger bowl, beat together the softened butter and granulated sugar until it's light and fluffy, about 3-5 minutes.This is a crucial step to achieve the right texture.Add Wet Ingredients
Mix in the egg, vanilla extract, and red food coloring.Blend thoroughly until you achieve a deep crimson color.Combine Mixtures
Gradually fold the dry ingredients into the creamy mixture until combined, being careful not to overmix.Shape Cookies
Scoop tablespoon-sized portions of dough, roll into balls, and roll each ball in powdered sugar.Prepare for Baking
Place dough balls on a lined baking sheet, spaced about 2 inches apart.Bake
Bake for 10-12 minutes, until the edges are set and the center is soft.Trust your instincts!Cool Down
Let cookies cool on the baking sheet for about 3 minutes before transferring them to a wire rack.Cooling allows them to set properly.
Nutrition Facts
Servings 24
- Amount Per Serving
- Calories 120kcal
- % Daily Value *
- Total Fat 7g11%
- Saturated Fat 4g20%
- Trans Fat 0g
- Cholesterol 20mg7%
- Sodium 90mg4%
- Potassium 100mg3%
- Total Carbohydrate 15g5%
- Dietary Fiber 1g4%
- Sugars 8g
- Protein 1g2%
- Vitamin A 200 IU
- Vitamin C 0 mg
- Calcium 20 mg
- Iron 1 mg
- Vitamin D 0 IU
- Vitamin E 0 IU
- Vitamin K 0 mcg
- Thiamin 0 mg
- Riboflavin 0 mg
- Niacin 0 mg
- Vitamin B6 0 mg
- Folate 10 mcg
- Vitamin B12 0 mcg
- Biotin 0 mcg
- Pantothenic Acid 0 mg
- Phosphorus 20 mg
- Iodine 0 mcg
- Magnesium 0 mg
- Zinc 0 mg
- Selenium 0 mcg
- Copper 0 mg
- Manganese 0 mg
- Chromium 0 mcg
- Molybdenum 0 mcg
- Chloride 0 mg
* Percent Daily Values are based on a 2,000 calorie diet. Your daily value may be higher or lower depending on your calorie needs.