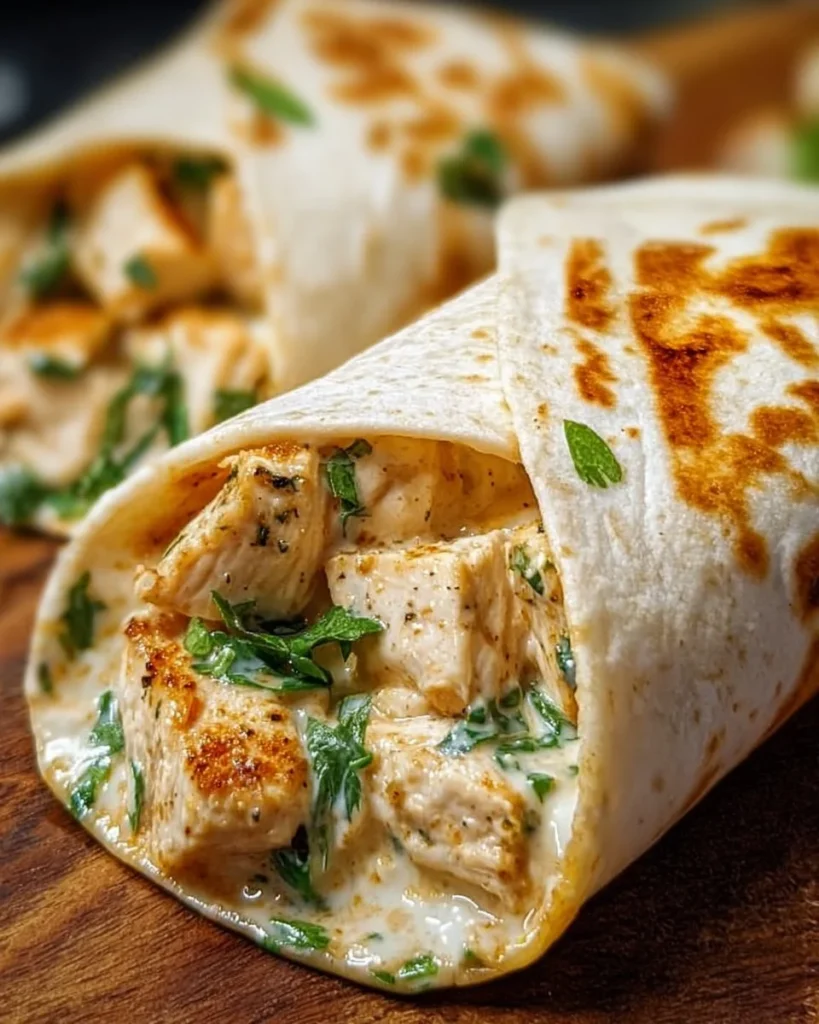
There’s something incredibly satisfying about wrapping up a delicious meal in a cozy tortilla. Whenever I make these Cheesy Garlic Chicken Wraps, it feels like I’m inviting comfort and joy right into my kitchen. I remember the first time I whipped these up; it was a chilly evening, and I had some leftover rotisserie chicken in the fridge. A little experimentation led me here, and the warm, cheesy goodness of these wraps instantly became a favorite in our household. It’s one of those meals that never fails to impress—whether you’re feeding a crowd or just treating yourself.
Why you’ll love this recipe
Let’s chat about why you should dive headfirst into making these wraps tonight. First off, the flavor profile is absolutely glorious. Imagine tender, shredded chicken mixed with rich garlic aioli, all wrapped up in a warm, cheesy hug of melted cheddar. It’s like a party in your mouth! What makes this recipe truly special is its versatility. You can customize it to your heart’s content, adding your favorite toppings or even changing up the base ingredients. Want a spicy twist? Toss in some jalapeños! Prefer a light version? Substitute the garlic aioli with Greek yogurt.
Besides being a breeze to throw together in under 30 minutes, these wraps also make for excellent leftovers (if there are any, that is). They’re packed with protein and can be easily served as a quick weeknight dinner or a fun lunch option. Trust me when I say, once you’ve made these wraps, they will become a staple in your meal rotation.
Gather these ingredients
So, let’s talk about the ingredients you’ll need to bring these cheesy creations to life.
2 cups cooked chicken (shredded): If you’re short on time, grab a rotisserie chicken from the store. Shred away, and you’re already halfway to wrap heaven! If you want a lighter option, consider subbing with turkey or even chickpeas for a vegetarian flair.
1/2 cup garlic aioli: This zesty sauce is the heart of the wrap. It adds a delightful garlic kick that plays beautifully with the chicken. If you’re in a pinch, homemade mayo with minced garlic will work wonders too—and you’ll feel like a culinary rockstar!
1 cup cheddar cheese (shredded): Who doesn’t love cheese? It wraps everything up in rich, gooey goodness. If you’re feeling adventurous, try pepper jack for a spicy kick or even a blend of Mexican cheeses for that south-of-the-border flair.
4 large tortillas: Opt for flour or whole wheat—whatever your heart desires. You could even use lettuce wraps for a low-carb version!
Salt and pepper to taste: The separators of bland from beautiful! Season as you go, and remember, you can always add more, but it’s hard to take it out.
Preparing Cheesy Garlic Chicken Wraps
Now, let’s get down to business. Are you ready to whip up some magic? Follow these steps, and you’ll have your wraps ready in no time.
Preheat your oven (or skillet): If you want that delightful crisp on your tortillas, preheat your oven to about 400°F (200°C) or heat a skillet over medium heat.
Mix the filling: In a large bowl, combine the shredded chicken, garlic aioli, and half of your shredded cheese. Add salt and pepper to taste. This is where you want to really taste it—if it feels a bit flat, add more seasoning!
Assemble the wraps: Lay out your tortillas. Spoon the chicken mixture down the center of each, and sprinkle the remaining cheese on top. Roll the tortillas tightly; this is where you channel your inner burrito-wrapping pro.
Toast it up!: If you’re using the oven, place the wraps seam-side down on a baking sheet and bake for about 10-15 minutes, until they are golden brown and crispy. If you’re using a skillet, place the wraps seam-side down and toast until golden, around 2-3 minutes on each side.
Slice and serve: Once they’re out of the oven or skillet, let them cool for a minute or two. A quick diagonal slice gives you that gorgeous presentation—serve warm with extra garlic aioli on the side for dipping. Trust me, it’s addictive!
Best way to enjoy it
When it comes to enjoying your Cheesy Garlic Chicken Wraps, the sky’s the limit! Pair them with a simple side salad for a fresh crunch or some roasted veggies for a hearty accompaniment. They’re also fabulous with some homemade salsa or guacamole for an extra kick. Feeling adventurous? Try a sprinkle of fresh cilantro or a squeeze of lime over the top before digging in; it adds a burst of brightness that’s irresistible!
Keeping leftovers fresh
Leftovers deserve love too! If you’ve got any wraps hanging around, place them in an airtight container in the fridge—they’ll be good for about 3 days. When you’re ready to devour them again, you can pop them back into the oven at 350°F (175°C) for about 10 minutes to reheat. Just make sure you don’t skip this step; no one loves a cold wrap!
If you want to save some for future cravings, wrap them tightly in foil and freeze them before cooking. When you’re ready to enjoy, allow them to thaw overnight in the refrigerator and cook as directed. Bingo—homemade convenience meals!
Pro chef tips
Here are a few perks I’ve picked up along the way to make your wraps divine:
- Don’t rush the seasoning: Always taste as you go. It’s like adding salt to a cookie dough—essential for balance!
- Experiment with textures: A little bit of crunch goes a long way. Consider adding crushed tortilla chips or fresh veggies inside for a delightful twist.
- Don’t skip toasting: Toasting your tortillas not only elevates the flavor but also helps to prevent sogginess—no one likes a limp wrap!
Creative Twists
Feeling adventurous? Here are some fun variations to switch things up!
- Switch the protein: Swap out the chicken for grilled steak, shrimp, or tofu. Each will bring its own flavor party to the table.
- Flavor alternatives: Try adding a layer of pesto or barbecue sauce for a different taste. It’s amazing how a little switch can lead to completely new vibes!
- Add some greens: Toss in some fresh spinach or arugula for added nutrition and a pop of color.
Ingredients
- 2 cups cooked chicken (shredded)
- 1/2 cup garlic aioli
- 1 cup cheddar cheese (shredded)
- 4 large tortillas
- Salt and pepper to taste
Directions to follow
- Preheat your oven to 400°F (200°C) or heat a skillet over medium heat.
- In a bowl, combine shredded chicken, garlic aioli, and half of the cheese. Season with salt and pepper.
- Lay out tortillas; spoon filling down the center and sprinkle remaining cheese on top. Roll tightly.
- Place wraps seam-side down on a baking sheet (or in the skillet) and bake for 10-15 minutes or toast until golden.
- Slice diagonally and serve warm, with extra aioli for dipping.
Common questions
- Can I use uncooked chicken? Absolutely! Just cook it thoroughly first.
- What can I substitute for garlic aioli? A zesty Greek yogurt or homemade mayo with garlic works great.
- How long do they last in the fridge? About 3 days; reheat to enjoy!
- Can I make them vegetarian? You bet! Swap the chicken for chickpeas or sautéed veggies.
- What’s the prep time? You’re looking at about 10-15 minutes for prep, then cooking time.
These Cheesy Garlic Chicken Wraps are your culinary blank canvas. Mix, match, and make them your own! So, gather your ingredients, pour a glass of your favorite drink, and start cooking—it’s all about creating delicious memories. Let me know how yours turn out; I’d love to hear about your own twists and triumphs! Happy cooking!

Cheesy Garlic Chicken Wraps
Description
These Cheesy Garlic Chicken Wraps are a delightful blend of tender shredded chicken, rich garlic aioli, and gooey cheddar cheese, all wrapped up in warm tortillas. Perfect for a quick weeknight dinner or a fun lunch, this recipe is sure to impress!Ingredients
Wrap Filling
Instructions
Preparation
Preheat Oven or Skillet
Preheat your oven to 400°F (200°C) or heat a skillet over medium heat.Mix the Filling
In a large bowl, combine shredded chicken, garlic aioli, and half of the shredded cheese. Season with salt and pepper to taste.Assemble the Wraps
Lay out your tortillas. Spoon the chicken mixture down the center of each tortilla and sprinkle the remaining cheese on top. Roll the tortillas tightly.Toast the Wraps
If using the oven, place wraps seam-side down on a baking sheet and bake for 10-15 minutes until golden brown. If using a skillet, toast until golden, around 2-3 minutes on each side.Serve
Let them cool for a minute, then slice diagonally and serve warm with extra garlic aioli for dipping.
Nutrition Facts
Servings 4
- Amount Per Serving
- Calories 450kcal
- % Daily Value *
- Total Fat 25g39%
- Saturated Fat 10g50%
- Cholesterol 80mg27%
- Sodium 600mg25%
- Potassium 600mg18%
- Total Carbohydrate 40g14%
- Dietary Fiber 3g12%
- Sugars 2g
- Protein 30g60%
- Vitamin A 15 IU
- Vitamin C 4 mg
- Calcium 20 mg
- Iron 10 mg
* Percent Daily Values are based on a 2,000 calorie diet. Your daily value may be higher or lower depending on your calorie needs.