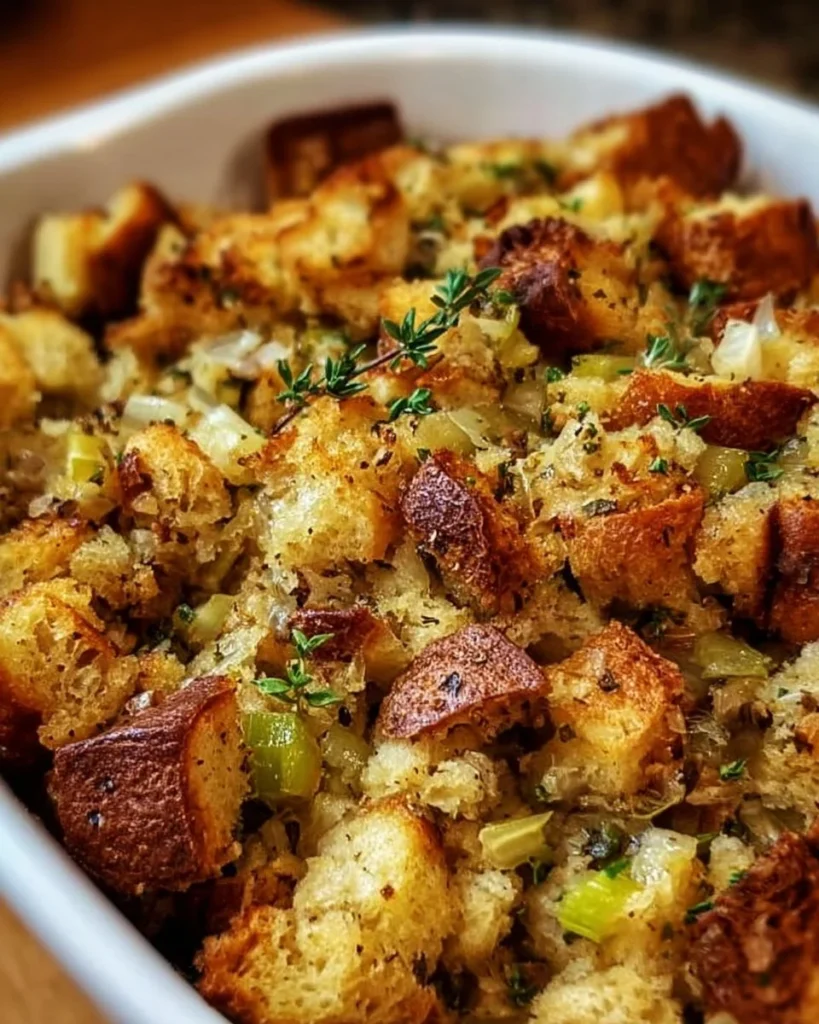
You know, there’s something truly magical about Thanksgiving stuffing that takes us all back to simpler times—like the warmth of Grandma’s kitchen, filled with the aroma of butter and herbs. This was the recipe that graced our family table every year, a dish that brought everyone together, laughter echoing while we anxiously awaited the turkey’s triumphant arrival. It’s more than just food; it’s nostalgia served in a bowl, a delightful reminder of cherished moments and family gatherings. Let’s dive in and create our own masterpiece that will make your loved ones swoon.
What makes this recipe special
You might be wondering why this stuffing stands out among the rest. First off, the combination of fresh herbs—sage, thyme, and rosemary—is simply to die for. They weave through the dish like a thread of comfort, elevating the taste and wrapping it in layers of flavor that’ll have your taste buds dancing. The choice of bread, whether you pick crusty sourdough or traditional French, adds a texture that’s soft yet hearty, a canvas for all those delicious ingredients.
And let’s talk about the broth—low-sodium, of course—because we want those flavors to shine without overwhelming saltiness. Plus, the warmth of unsalted butter melting into the mix is an absolute must! It gives that rich taste, elevating this dish to a joyous celebration of flavors. You can practically picture Grandma smiling down on us from her kitchen, urging us to make every bite memorable.
Gather these ingredients
Bread (sourdough or French): 10 cups cubed. You want a good crust! It will provide that lovely crunch and absorb all the deliciousness without turning into mush.
Onion: 1 large, finely diced. This will be the aromatic base; it caramelizes beautifully, adding sweetness with every bite.
Celery: 2 cups, finely chopped (about 3-4 stalks). The crunch factor! Celery will give a refreshing note to the stuffing, and its subtle earthiness balances everything perfectly.
Fresh herbs: 2 tbsp sage, 2 tbsp thyme, 1 tbsp rosemary (all finely chopped). Fresh is key here, my friend! Dried herbs just don’t cut it when you want that vibrant flavor bursting through.
Low-sodium broth: 4 cups (chicken or vegetable). Use what you have on hand or prefer—both work like a charm! Just remember, go low-sodium to let those herbs shine.
Unsalted butter: ½ cup (1 stick), melted. You want the richness without the salt here, so steer clear of anything else.
Salt and pepper: To taste. These are your best buddies for bringing all those flavors together.
The cooking process explained
Preheat your oven to 350°F (175°C). Get that warmth going so your stuffing can have a deliciously golden finish!
Cube the bread into bite-sized pieces. Aim for about an inch. Spread it on a baking sheet and toast it in the oven for about 10-12 minutes until just golden. This step is magic! It gives the bread a sturdy bite later on.
In a large skillet, melt your butter over medium heat. When it’s melted and bubbling, toss in the diced onion and chopped celery. Sauté until the onion is translucent and soft, about 5 minutes. Oh, the aroma—it’s already beginning!
Stir in your fresh herbs, letting them mingle for about a minute. This releases their oils and flavors into the mixture—trust me, you don’t want to skip this!
Transfer your toasted bread to a large mixing bowl and pour the butter mixture right over it.
Pour in the broth, stirring gently until the bread is soaked but not soggy. You want each piece to absorb that deliciousness without disintegrating.
Season with salt and pepper to your liking—taste as you go!
Spread evenly in a greased baking dish. Cover with aluminum foil and bake for about 30-35 minutes, then remove the foil for the last 10-15 minutes for a crispy top.
Let it cool slightly before serving. Trust me, it’s worth the wait!
How to serve it
Now, let’s talk about how to showcase this beauty. You can either dish it directly on the plate or serve it alongside your Thanksgiving turkey—it’s a perfect sidekick! A generous scoop on a cozy plate topped with a drizzle of gravy is always a hit. Don’t forget to sprinkle fresh herbs on top for a pop of color.
If you want a bit of flair, try adding dried cranberries or chopped apples for a sweet contrast. Pair it with roasted veggies or a simple green salad for balance. It really complements rich flavors beautifully—a harmony of taste that elevates your Thanksgiving meal.
Keeping leftovers fresh
Oh, leftovers can be a blessing! Store any uneaten stuffing in an airtight container in the fridge. It’ll keep for about 3-4 days—just make sure to reheat it well to bring back that deliciousness. I often pop it in the oven at 350°F for about 20 minutes with a splash of broth on top to keep it moist. You can even freeze it for up to 3 months—just thaw it completely before reheating.
Pro chef tips
Allow leftovers to cool completely before storing them; this prevents condensation and sogginess.
Adjust spices freely! If you adore garlic, why not throw in some sautéed garlic with the onions?
If gluten-free, use gluten-free bread. It works just as well and allows everyone to join in on the feast!
Don’t shy away from customization. This is a great base recipe that welcomes any flavors or textures you love!
Flavor swaps
Feel adventurous? Try adding chopped pecans or walnuts for a bit of crunch. You can even experiment with sausage seasoning or diced sausage for a protein-packed variation. If you’re feeling a bit saucy, throw in some sautéed mushrooms for that earthy richness!
Common questions
How long does it take to prepare?
It takes about 20 minutes to prep and approximately 45 minutes to cook.What can I serve it with?
It pairs beautifully with turkey, ham, or even a hearty mushroom dish for a vegetarian feast!Can I prepare it ahead of time?
Absolutely! You can assemble it the night before, keep it covered in the fridge, and bake it on the day.Is there a vegan substitute?
Yes! Use plant-based butter and vegetable broth, and skip the sausage.What’s the best way to reheat?
Reheat covered in the oven with a splash of broth to keep it moist—no one wants dry stuffing!
This stuffing is just like Grandma used to make—perfectly savory, aromatic, and filled with love. I encourage you to give it a whirl this Thanksgiving and maybe even make it a family tradition. Always remember, it’s the love and effort that makes a dish special. Get creative, enjoy the process, and most importantly, share those delicious moments with the ones you love. I can’t wait to hear how it turns out for you!

Delicious Grandma’s Thanksgiving Stuffing Recipe
Description
A rich and aromatic stuffing made with fresh herbs, crusty bread, and flavorful broth, perfect for Thanksgiving celebrations.Ingredients
Stuffing Ingredients
Instructions
Cooking Instructions
Preheat the oven
Preheat your oven to 350°F (175°C).Ensure the oven is fully heated before placing the stuffing.Toast Bread
Cube the bread into bite-sized pieces, spread on a baking sheet, and toast in the oven for about 10-12 minutes until golden.This step ensures the bread maintains its texture.Sauté Vegetables
In a large skillet, melt butter over medium heat and add the diced onion and chopped celery. Sauté until the onion is translucent (about 5 minutes).The aroma will fill your kitchen!Add Herbs
Stir in fresh herbs and sauté for another minute.This enhances the flavor.Combine Ingredients
Transfer the toasted bread to a large mixing bowl and pour the butter mixture over it. Add in the broth and mix gently.Ensure the bread soaks up the mixture without becoming soggy.Bake
Spread the mixture in a greased baking dish, cover with aluminum foil, and bake for about 30-35 minutes. Remove the foil for the last 10-15 minutes for a crispy top.Let it cool slightly before serving.
Nutrition Facts
Servings 8
- Amount Per Serving
- Calories 250kcal
- % Daily Value *
- Total Fat 20g31%
- Saturated Fat 10g50%
- Trans Fat 0g
- Cholesterol 30mg10%
- Sodium 400mg17%
- Potassium 250mg8%
- Total Carbohydrate 35g12%
- Dietary Fiber 2g8%
- Sugars 3g
- Protein 6g12%
- Vitamin A 100 IU
- Vitamin C 5 mg
- Calcium 30 mg
- Iron 2 mg
- Vitamin D 0 IU
- Vitamin E 1 IU
- Vitamin K 10 mcg
- Thiamin 0.1 mg
- Riboflavin 0.2 mg
- Niacin 2 mg
- Vitamin B6 0.1 mg
- Folate 30 mcg
- Vitamin B12 0 mcg
- Biotin 0 mcg
- Pantothenic Acid 0.5 mg
- Phosphorus 80 mg
- Iodine 0 mcg
- Magnesium 15 mg
- Zinc 0.5 mg
- Selenium 10 mcg
- Copper 0.1 mg
- Manganese 0.5 mg
- Chromium 0 mcg
- Molybdenum 0.5 mcg
- Chloride 0 mg
* Percent Daily Values are based on a 2,000 calorie diet. Your daily value may be higher or lower depending on your calorie needs.